Digital Manager Guru
Follow this step-by-step guide to integrate your sales flow with the Mentorfy delivery flow.
Webhook Link
Before configuring the webhook in Digital Manager Guru, create an Entry URL in Mentorfy. This URL defines which products, categories, or classes will be unlocked when Guru confirms a sale.
- In Mentorfy, go to Integrations > Entry and click + New URL.
- Fill in the URL with a descriptive name, select DM Guru as the payment gateway, and choose the products and/or categories to be unlocked.
- Click Create and copy the generated URL.
See the full step-by-step guide at How to create an Entry URL.
Digital Manager Guru Platform
Access the Digital Manager Guru platform:
1- Go to the Settings page and choose the Webhooks option:
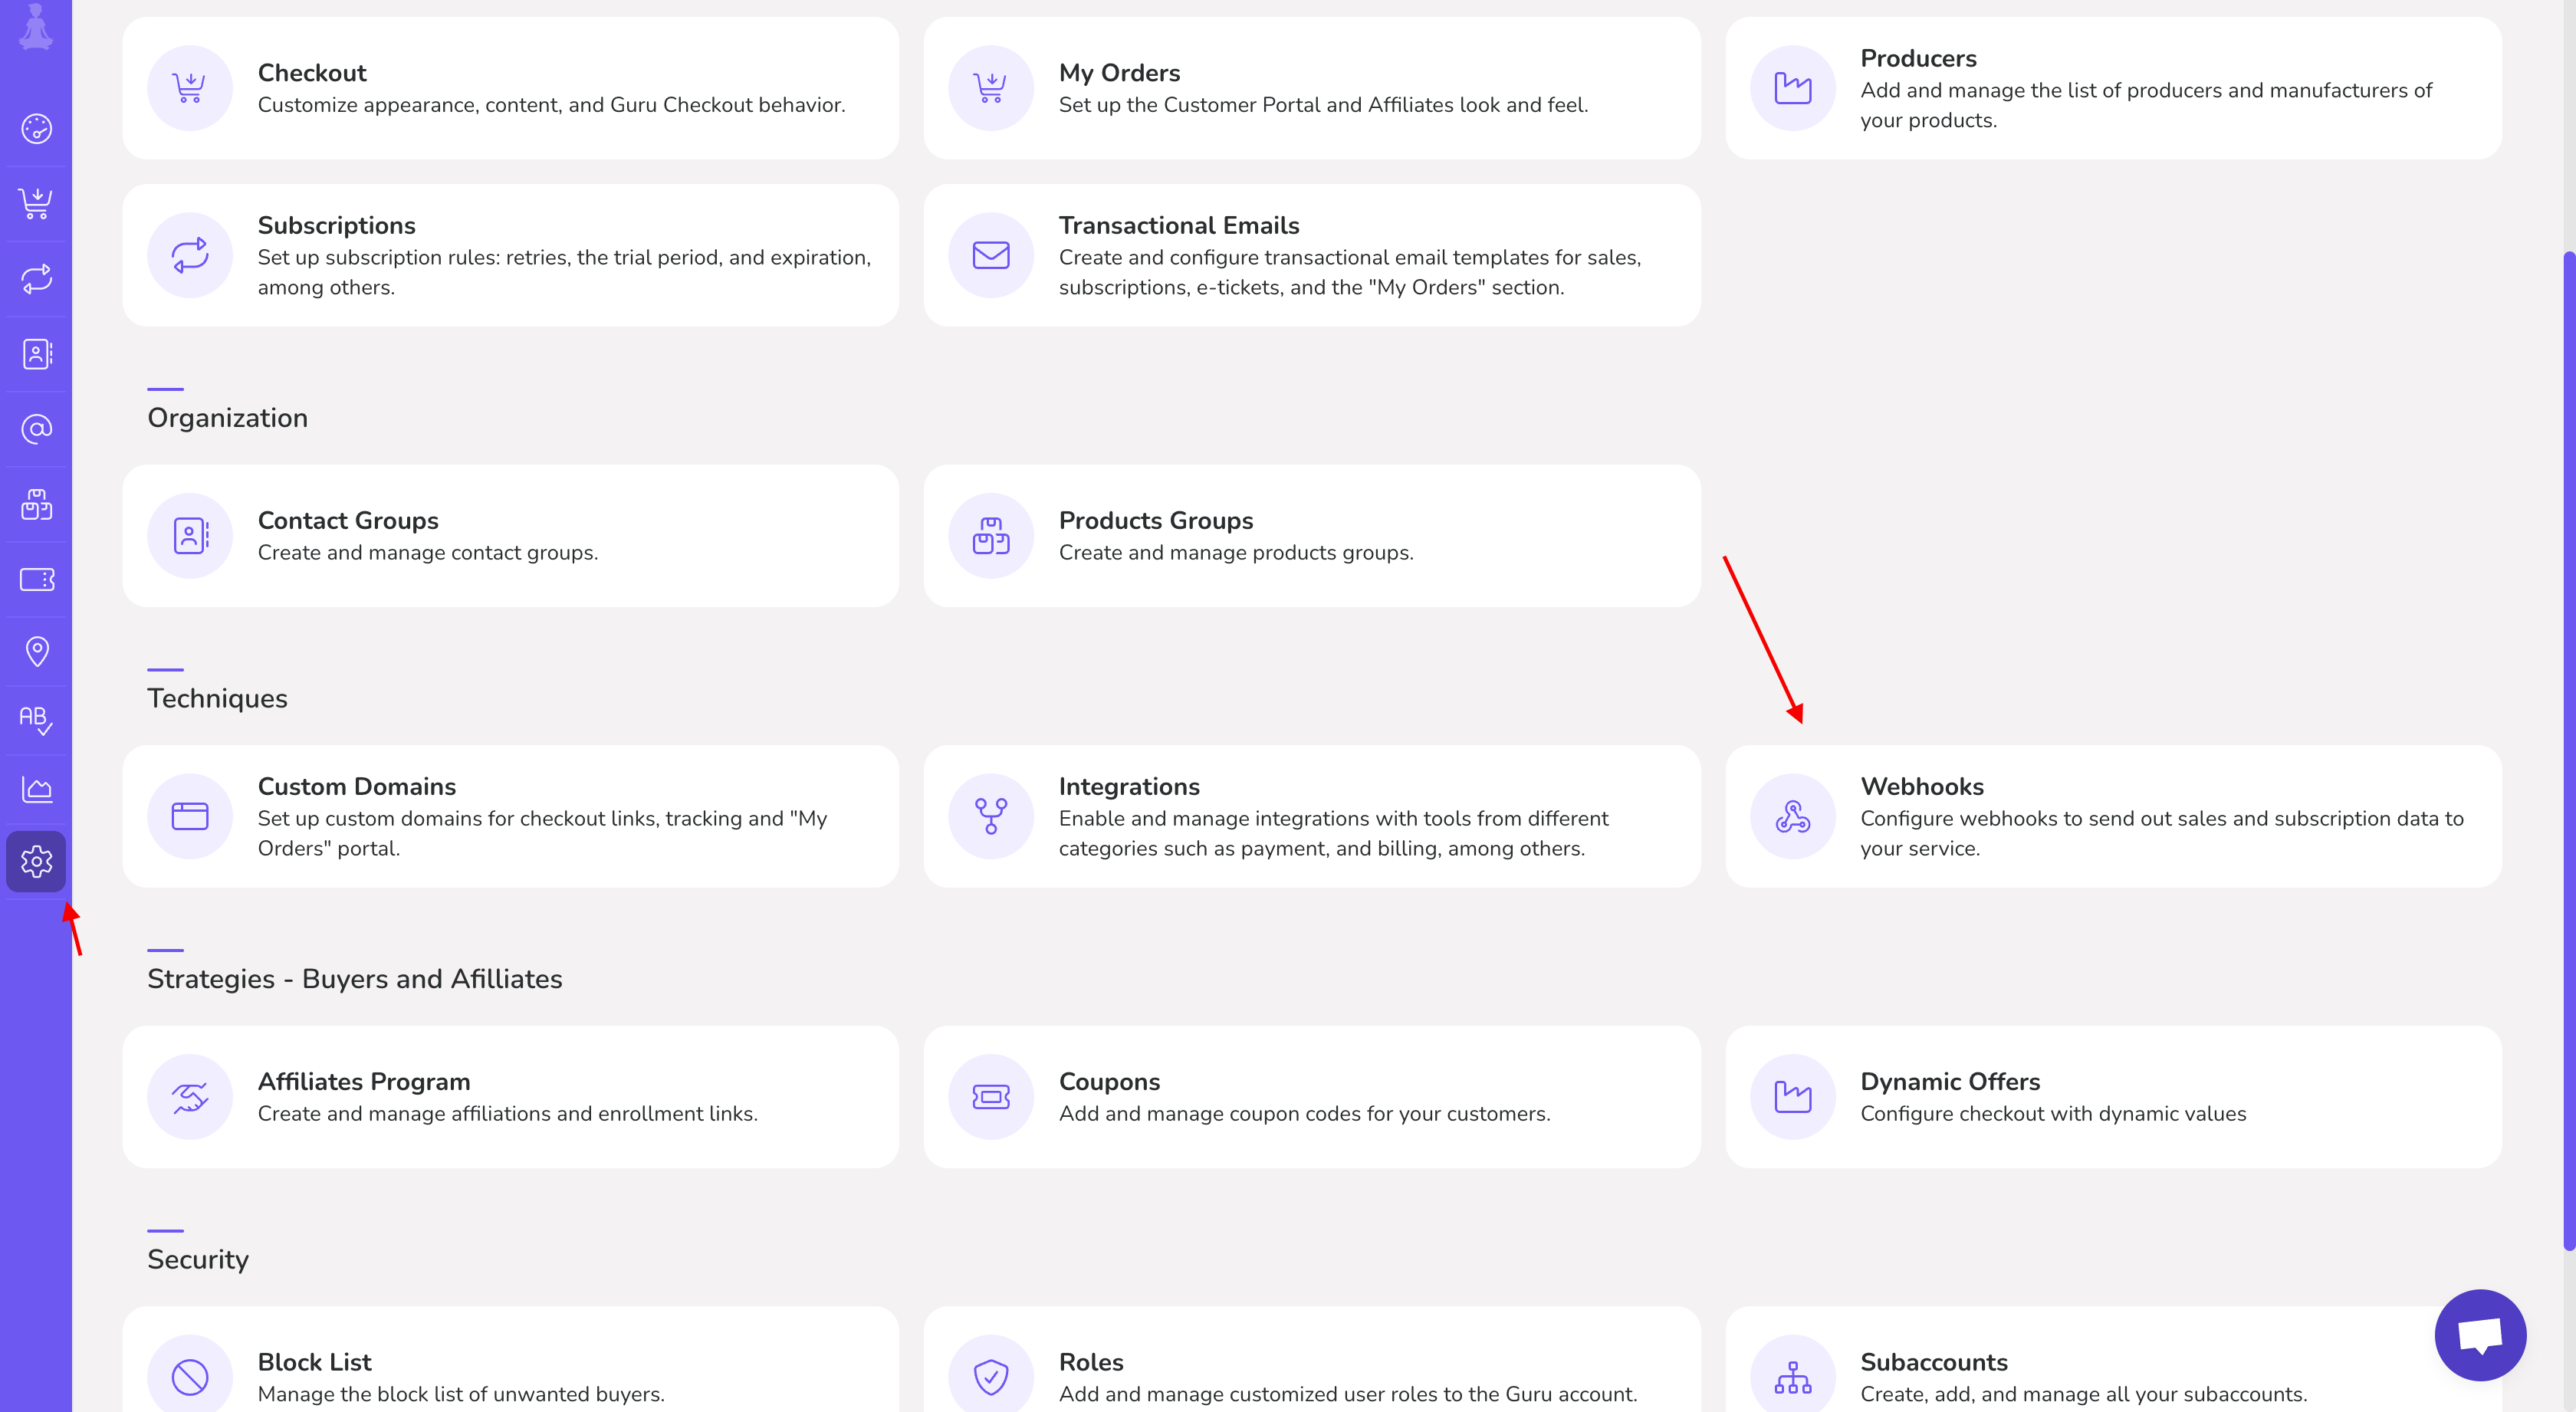
2- On the Webhooks page, you will see the Add webhook option — click it:

3- In the Add Webhook modal, configure the following fields:
- Name: Give a name to identify the integration (e.g., "Mentorfy - Course Delivery")
- URL: Paste here the Entry URL you generated in Mentorfy
- Concurrent Requests: Sets the concurrent requests limit (the default is usually 5)
- Status: Select which sale statuses should trigger the notification (e.g., select "Approved/Paid" to unlock student access)
- Filter by: Choose All to send all sales or Products if you want to filter specific products only
- Active: Make sure the toggle is marked as active (purple)
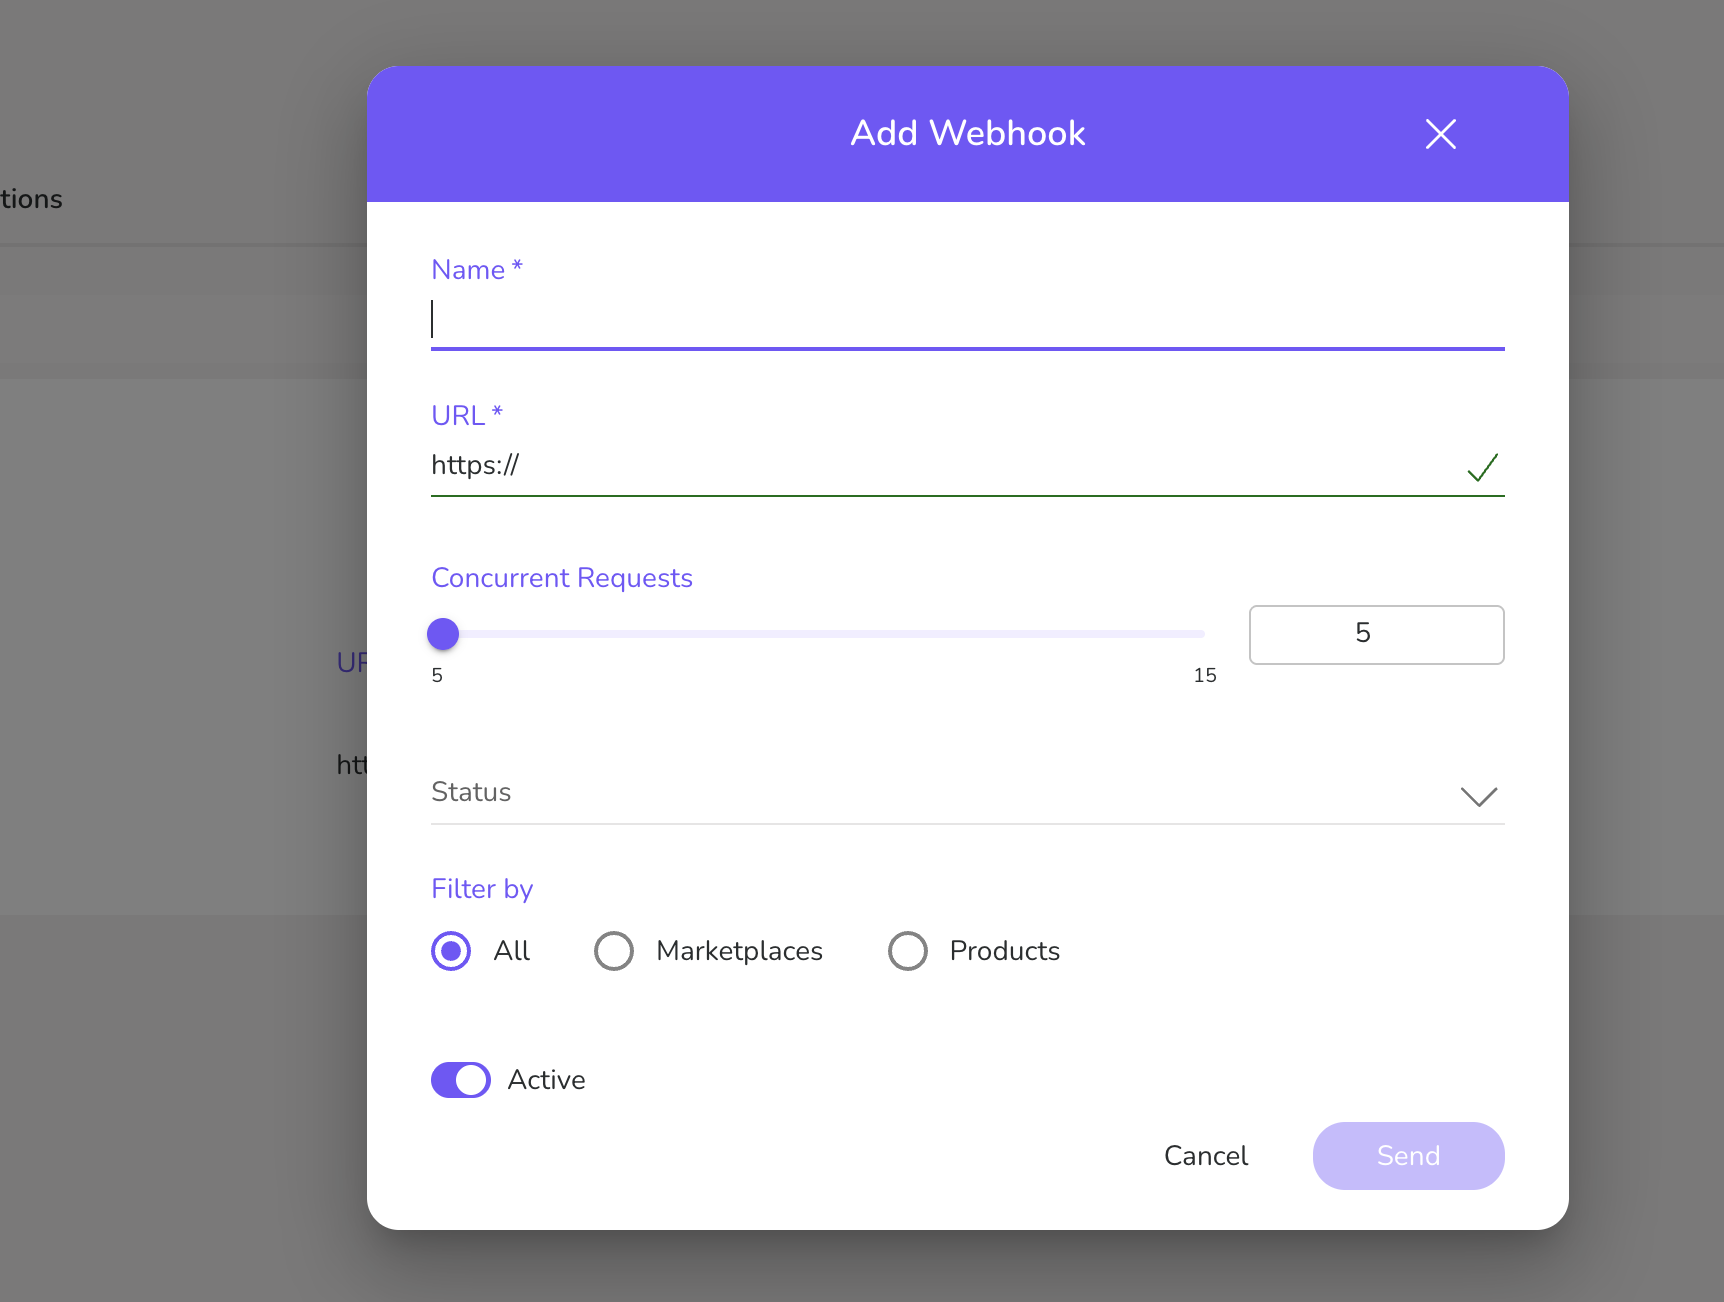
4- Finish: Click Send (or Create) to save the configuration. From now on, whenever a sale reaches the selected status in Guru, Mentorfy will receive the notification and automatically unlock access.
Conclusion
Once you complete these steps, the integration will be complete and you will be able to test it.