Voomp
Follow this step-by-step guide to integrate your sales flow with the Mentorfy delivery flow using Voomp.
Before configuring the webhook, create an Entry URL in Mentorfy. This URL defines which products, categories, or classes will be unlocked when Voomp confirms a purchase.
-
In Mentorfy, go to Integrations > Entry and click + New URL.
-
Fill in the URL with a descriptive name, select Voomp as the payment gateway, and choose the products and/or categories to be unlocked. Then click Create and copy the generated URL.
See the full step-by-step guide at How to create an Entry URL.
Configuring the Webhook in Voomp
- Access the side menu on the Voomp platform:
Dashboard > Integrations > Configure Webhook integration
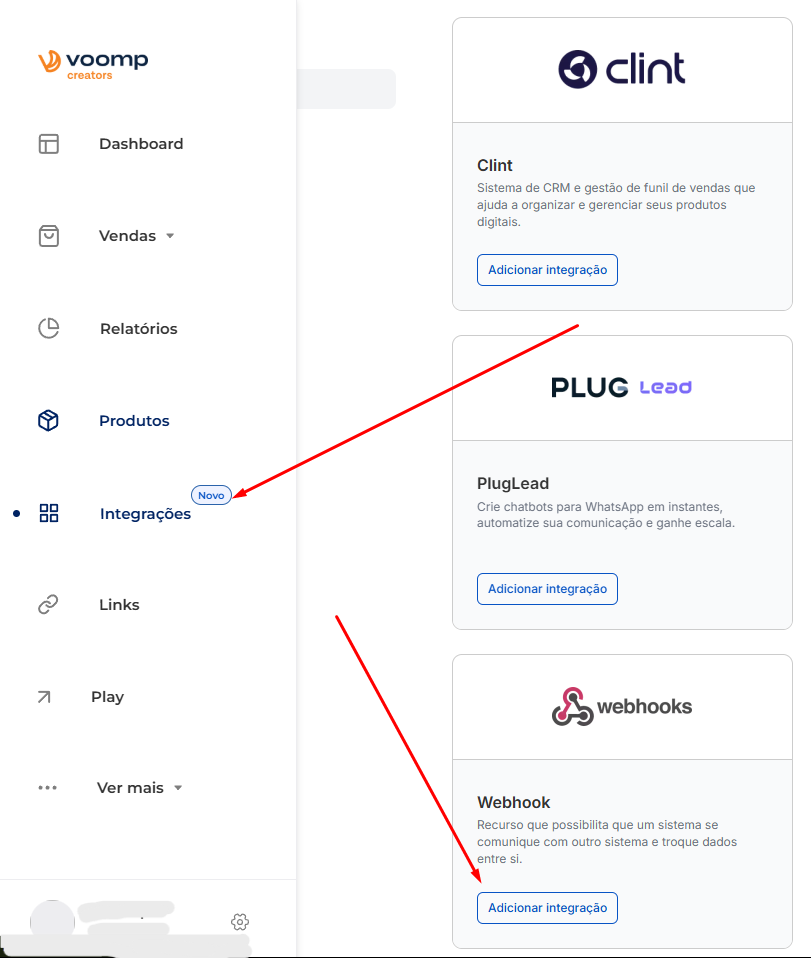
- On the Webhook configuration page, you will need to:
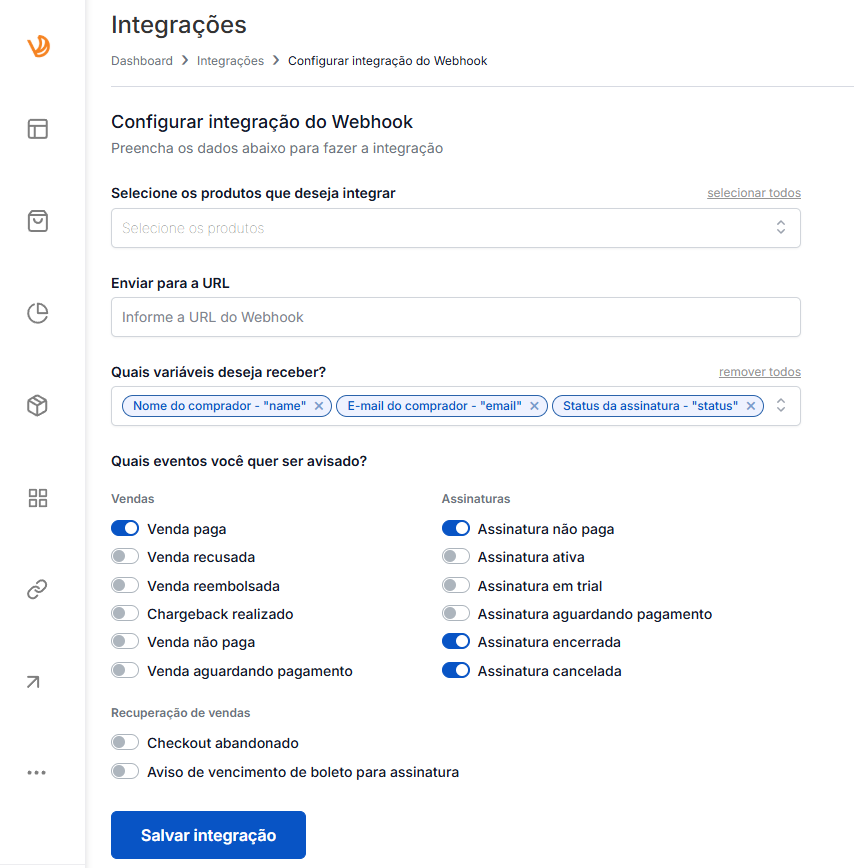
- Select the products you want to integrate
- Enter the Webhook URL: paste the Entry URL you copied from Mentorfy
- Choose the variables you want to receive
- Select the events you want to be notified about
-
Configure the following options:
- Under "Variables to receive", select:
- Buyer's name - "name"
- Buyer's email - "email"
- Subscription status - "status"
- Under "Variables to receive", select:
-
Under "Events", we recommend enabling:
-
Sales:
- Paid sale
-
Subscriptions:
- Unpaid subscription
- Ended subscription
- Cancelled subscription
-
-
Click "Save integration" to finish the configuration.
Testing the integration
After configuring the webhook in Voomp:
- Make a test sale in Voomp for the configured product.
- Check that the event is received correctly in Mentorfy.
- Confirm that the customer appears in the journey and in the Mentorfy customer list.
Conclusion
Once you complete these steps, the integration will be complete and you will be able to see your customers in the journey and in your customer list in Mentorfy.
If you have any questions, contact our support via chat on the platform or by email: contato@mentorfy.io