Integrations
The Integrations area allows you to configure webhooks and connections with external platforms. Settings are organized in the following tabs: Incoming, Outgoing, Automations, Keys, Widgets, and Logs.
Incoming — Incoming URLs
Incoming URLs are used to receive webhooks from payment gateways. Each URL generated here automatically grants student access to the corresponding product when a purchase is confirmed on the source platform.
How to create a new Incoming URL
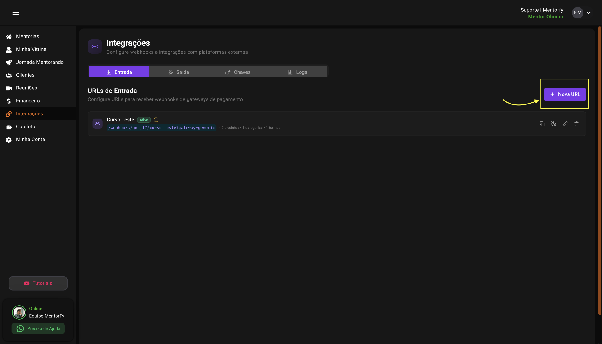
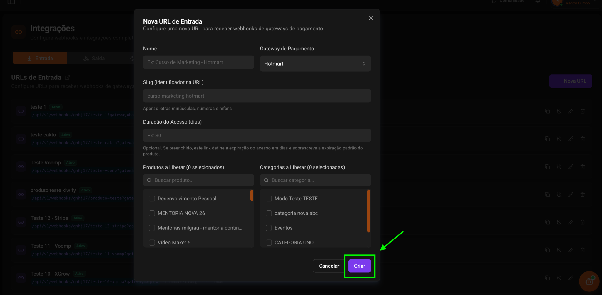
Click "+ New URL" in the upper right corner. A form will appear with the following fields:
Name: Identify the integration with a descriptive name.
- Example: Marketing Course - Hotmart
Payment Gateway: Select the sales source platform. Available gateways include: Hotmart, Cakto, Voomp, Kiwify, Stripe, XGrow, among others.
Slug (URL identifier): Automatically generated from the name, but can be customized.
- Use only lowercase letters, numbers, and hyphens
- Example: curso-marketing-hotmart
Access Duration (days): Optional field. If filled in, defines how many days the student will have access to the product after purchase, overriding the default expiration configured on the product.
- Example: 30
Products to Release: Select which products will be automatically released when the webhook is received. Use the search field to locate them quickly.
Categories to Release: Select which product categories will be released. Also has a search field.
After filling in the form, click "Create" to generate the URL.
Managing existing URLs
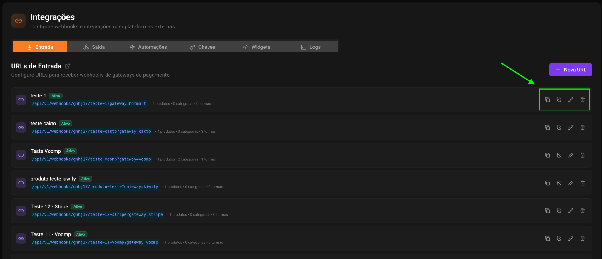
Each registered URL displays the name, status (Active), the generated endpoint, and the number of linked products, categories, and classes.
The available actions for each URL are:
- Copy — copies the endpoint to the clipboard
- Deactivate — temporarily suspends the integration
- Edit — changes the URL settings
- Delete — permanently removes the integration
Outgoing — Outgoing Webhooks
Outgoing Webhooks automatically fire notifications to external URLs whenever specific events occur on the platform. Use this feature to integrate Mentorfy with tools such as CRMs, automations (n8n, Make, Zapier), and other systems.
How to create a new Outgoing Webhook
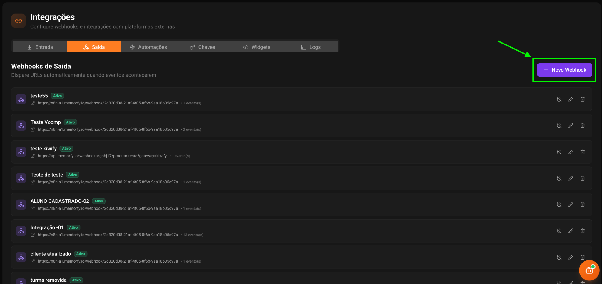
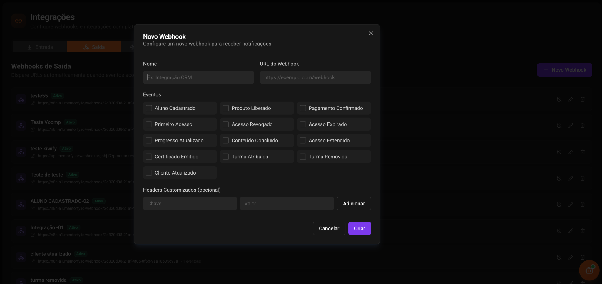
Click "+ New Webhook" in the upper right corner. The form displays the following fields:
Name: Identify the integration with a descriptive name.
- Example: CRM Integration
Webhook URL: Enter the destination URL that will receive the notifications.
- Example: https://exemplo.com/webhook
Events: Select which events will trigger the webhook. The available events are:
| Event | Description |
|---|---|
| Student Registered | New student registers on the platform |
| First Access | Student accesses for the first time |
| Progress Updated | Student advances in the content |
| Certificate Issued | Certificate is generated for the student |
| Client Updated | Client data is changed |
| Product Released | Access to a product is granted |
| Access Revoked | Access to a product is removed |
| Content Completed | Student completes a piece of content |
| Class Assigned | Student is added to a class |
| Payment Confirmed | Payment is confirmed |
| Access Expired | Access to the product expires |
| Access Extended | Access to the product is extended |
| Class Removed | Student is removed from a class |
You can select multiple events for the same webhook.
Custom Headers (optional): Add custom headers to the request by entering the Key and Value and clicking "Add". Useful for authentication with external APIs.
After filling in the form, click "Create" to save the webhook.
Managing existing Webhooks
Each registered webhook displays the name, status (Active), the destination URL, and the number of linked events.
The available actions are:
- Deactivate — temporarily suspends webhook firing
- Edit — changes the settings
- Delete — permanently removes the webhook
Automations (Experimental)
Automations allow you to create visual flows to execute actions automatically based on platform events. With them, you eliminate manual tasks and ensure the right actions happen at the right time.
How to create a new Automation
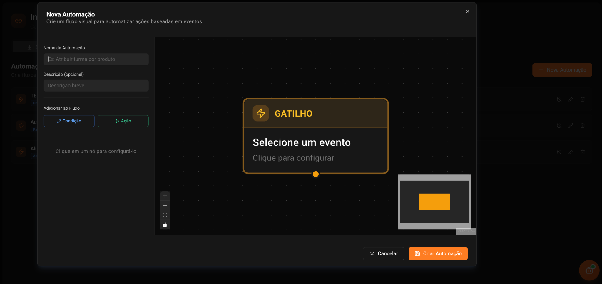
Click "+ New Automation" in the upper right corner. The visual editor will open with the following fields and components:
Automation Name: Give a descriptive name to identify the flow.
- Example: Assign class by product
Description (optional): Add a brief description to document the automation's purpose.
Template: Sequential Release ✨
To simplify the creation of sequential trails, the platform offers a ready-made template accessible directly from the "+ New Automation" button.
How to access the template
Click the arrow next to the "+ New Automation" button to open the Templates menu. Select Sequential Release - "Creates sequential release trail".
Configuring the Sequential Release trail
The assistant opens a guided form with the following fields:
Trail name: Give a descriptive name to identify the sequence. Example: Onboarding -> Module 1 -> Module 2
Chain automatically: toggle enabled by default. When active, the next step starts automatically with the product released in the previous step, without needing to configure manually.
Configuring trail steps
Each step represents a stage in the sequence and consists of two fields:
When they complete the product: select the product the student needs to complete in order to advance.
Release the products: select which product will be automatically released after completion. It is possible to add more than one product to release per step by clicking "+ Add product to release".
Click the trash icon next to the step title to remove it, or the arrow icon to collapse/expand.
Note: each step needs to have at least one trigger product and one product to release selected. Otherwise, the platform will display a red warning and the "Create automations" button will be disabled.
Trail Preview
As the steps are configured, the Preview section at the bottom displays the complete sequence flow in real time. Example:
- Created by Copiloto -> Máquina de Vendas Imobiliárias com SaaS
- Máquina de Vendas Imobiliárias com SaaS -> Crie Músicas Infantis Educacionais do Zero
- Crie Músicas Infantis Educacionais do Zero -> Produto Modelo - Testes Internos
The preview also indicates how many automations will be created upon confirmation.
Finishing
Click "Create automations" to save. The platform will automatically create an individual automation for each trail step, all grouped with the Trail tag in the automations list.
After creation, each automation in the trail can be managed individually — edited, deactivated, or deleted. To remove the entire trail at once, click the layers icon available in the actions of any automation that belongs to it.
Video tutorial
Flow structure
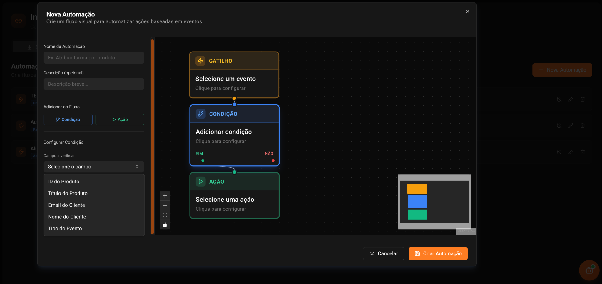
Each automation consists of three types of nodes connected in sequence:
1. Trigger: Click the TRIGGER node to configure the source event. In the "When it happens" field, select one of the available events:
| Event | Description |
|---|---|
| Access Expired | Student's access to the product expires |
| Progress Updated | Student advances in the content |
| Content Completed | Student completes a piece of content |
| Product Completed | Student completes an entire product |
| Access Extended | Access to the product is extended |
| Certificate Issued | Certificate is generated for the student |
Specific product (optional) Select a product to restrict the trigger. If left as "Any product", the automation will fire for all products when the event occurs.
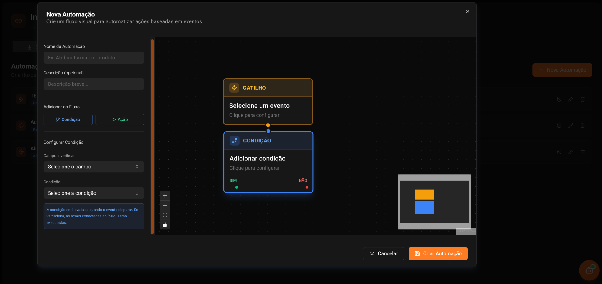
2. Condition (optional): Filters when the automation should or should not be executed. Click the CONDITION node to configure the filtering rule.
Available fields to check:
- Product ID
- Product Title
- Client Email
- Client Name
- Event Type
Available operators:
- Is equal to / Is not equal to
- Contains / Does not contain
- Is greater than / Is less than
- Is empty / Is not empty
The condition will be evaluated when the event fires. If true, the actions connected to YES will be executed. If false, the flow will follow the NO path.
3. Action: Defines what will be done when the trigger fires and the condition is met. Click the ACTION node to select the action to be executed.
| Action Type | Description |
|---|---|
| Release Product | The client will receive access to the selected product when the automation runs |
| Assign Class | The client will be automatically added to a class |
| Remove from Class | The client will be automatically removed from a class |
| Send Webhook | Fires a notification to an external URL |
| Send Email | Sends an automatic email to the client |
After selecting the action type, configure the corresponding parameters in the side panel, such as the product to release, the class to assign, or the destination webhook URL.
Adding more nodes to the flow
In the side panel, use the buttons:
- Condition — adds a new condition node to the flow
- Action — adds a new action node to the flow
You can chain multiple nodes to create more complex automations.
Use case: Sequential Mentorship Release ✨
Sequential release allows you to automatically control the order of access to mentorships. The student only receives access to the next mentorship after completing the previous one. The logic is the same as the progressive module release within a product, but applied between complete mentorships.
How to configure:
Step 1 — Create the automation In Integrations → Automations, click "+ New Automation" and give it a descriptive name, such as "Sequential release".
Step 2 — Configure the trigger In the "When it happens" field, select Product Completed. Under "Specific product", select the mentorship the student needs to complete before advancing.
Step 3 — Configure the action Add an Action node and select the Release Product type. Then choose which product will be automatically released next.
Step 4 — Save and activate Click "Create Automation". The automation will be activated immediately. To pause without losing the configuration, simply deactivate it via the toggle in the automations list.
💡 Repeat the process for each step in the sequence. Example: Mentorship A → completed → releases Mentorship B → completed → releases Mentorship C.
Managing existing Automations
Each registered automation displays the name, status (Active), the configured trigger, the action destination, and the number of linked actions.
The available actions are:
- Deactivate — temporarily suspends the automation
- Edit — opens the visual editor for changes
- Delete — permanently removes the automation
After configuring the flow, click "Create Automation" to save.
Keys — Security Keys
Security Keys are tokens used to validate the authenticity of webhooks received from payment gateways, ensuring that only legitimate requests are processed by the platform.
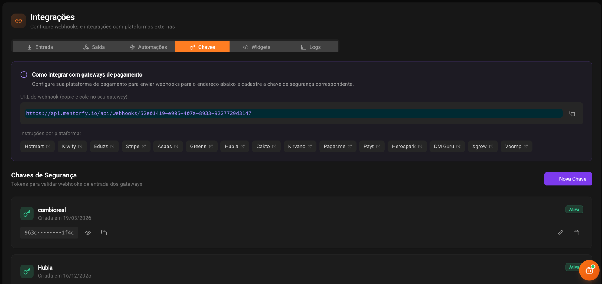
How to integrate with payment gateways
At the top of the page, you will find the webhook URL for your Mentorfy account. This is the URL that must be registered in your payment gateway so that it sends notifications correctly.
Click the copy icon next to the URL to copy it quickly.
The platform also offers specific instruction links for each gateway. Click the name of the desired platform to access the step-by-step configuration guide: Hotmart, Kiwify, Eduzz, Stripe, Asaas, Greenn, Hubla, Cakto, Kirvano, Pagar.me, Payt, Herospark, DM Guru, Xgrow, and Voomp.
How to create a New Security Key
Click "+ New Key" in the upper right corner. The form displays the following fields:
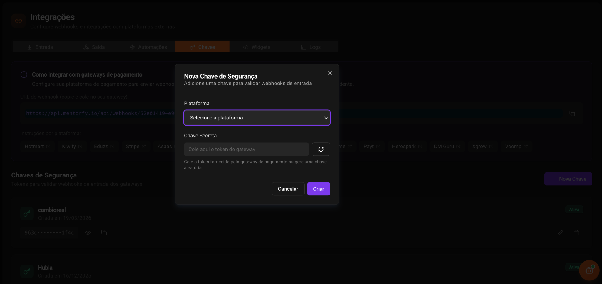
Platform: Select the payment gateway to which the key will be linked. Available platforms: Hotmart, Kiwify, Eduzz, Greenn, HeroSpark, PerfectPay, Kirvano, Cakto, Hubla, Asaas, Pagar.me, Payt, Voomp, Xgrow, and Stripe.
Secret Key: Paste the token provided by the payment gateway in the indicated field. If the gateway does not provide a token, click the refresh icon to generate a random key automatically.
After filling in the form, click "Create" to save the key.
Managing existing Keys
Each registered key displays the platform name, the creation date, and the token partially hidden for security.
The available actions are:
- View — temporarily displays the full token
- Copy — copies the token to the clipboard
- Edit — changes the key settings
- Delete — permanently removes the key
Widgets — Embedded Codes
The Widgets tab allows you to add scripts and external codes that will be loaded in the student area. Use it to integrate tools such as support chat, tracking pixels, analytics widgets, and much more.
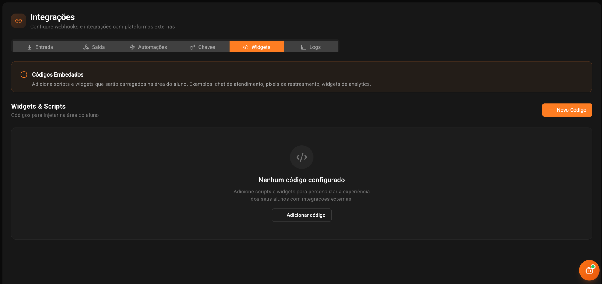
How to add a new code
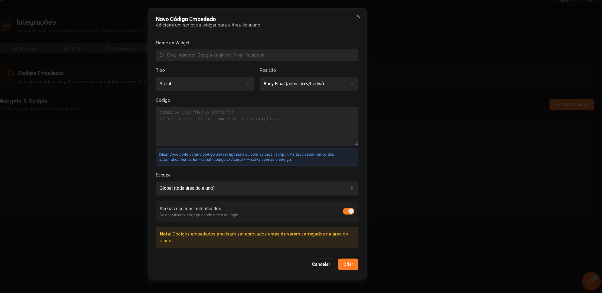
Click "+ New Code" or "+ Add code". The form displays the following fields:
Widget Name: Identify the code with a descriptive name.
- Examples: Intercom Chat, Google Analytics, Facebook Pixel
Type: Select the type of code to be inserted:
- Script — JavaScript code to be executed on the page
- HTML/Widget — HTML code to embed visual elements or external widgets
Position: Defines where the code will be injected in the page HTML:
- Head (before
</head>) — recommended for pixels and tracking scripts - Body Start (after
<body>) — loads at the very beginning of the page body - Body End (before
</body>) — default and recommended position for most scripts
Code: Paste the code in the indicated field.
You can paste pure JavaScript code or with <script> tags. The tags will be removed automatically.
Scope
- Global (entire student area) — loaded on all pages
- By Product (specific products) — loaded only on the pages of selected products
Authenticated users only
- Enabled (default): loads only after login
- Disabled: loads from the login screen
Note: Embedded codes need to be approved before being loaded in the student area.
After filling in the form, click "Create" to save.
Logs — Event Logs
The Logs tab provides complete visibility into all events processed by the integrations, allowing you to monitor successes, failures, and the real-time status of the webhook queue.
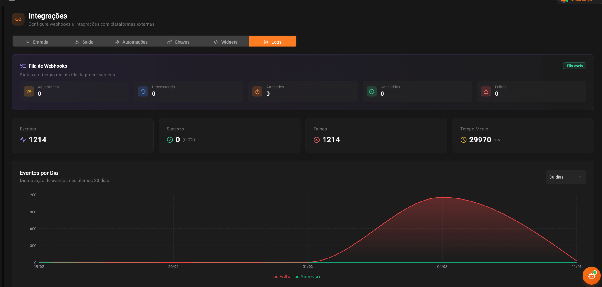
Webhook Queue
Real-time status panel of the processing queue:
| Indicator | Description |
|---|---|
| Waiting | Events in the queue waiting to be processed |
| Processing | Events currently being processed |
| Delayed | Events with processing delays |
| Completed | Events successfully processed |
| Failed | Events that failed during processing |
When a new event is received, live mode is activated automatically.
Performance Summary
| Indicator | Description |
|---|---|
| Events | Total events processed in the period |
| Success | Number and percentage of successful events |
| Failures | Number of events that failed |
| Average Time | Average response time in milliseconds |
Events per Day
Chart displaying the distribution of events over the last 30 days, with separate lines for Failure and Success. Use the selector in the upper right corner to adjust the displayed period.
Event Logs
Detailed table with the history of all triggered events:
| Column | Description |
|---|---|
| Date | Event date and time |
| Event | Type of event triggered |
| Direction | Incoming or Outgoing |
| Client | Email of the client related to the event |
| Status | Success or Failure |
| Time | Response time in milliseconds |
| Webhook | Name of the integration that processed the event |
Available filters:
- Search by email — finds events for a specific client
- Type filter — filters by event type
- Status filter — filters by specific integration
Click on any row in the table to expand the event details. Click the refresh icon in the upper right corner to manually reload the logs.