Classes
The Classes area allows you to create and manage classes in a centralized way, independent of products. The same class can be linked to multiple products, and each class can have its own integration webhook.
Overview
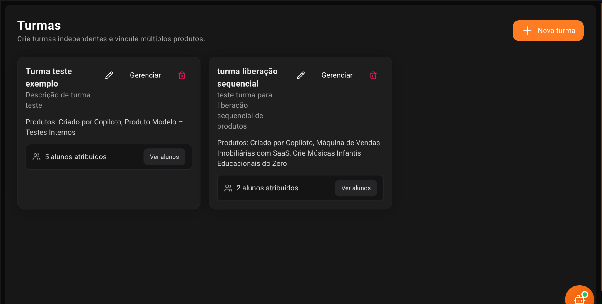
The main screen displays all created classes. Each card shows:
- Class name and description
- Linked products
- Number of assigned students
- View students button to consult members
Create a new class
Click "+ New Class" in the upper right corner. The process is divided into 2 steps.
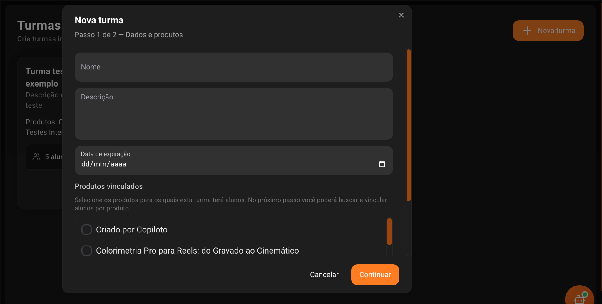
Step 1 - Data and Products
Fill in the fields:
| Field | Description |
|---|---|
| Name | Identification name of the class |
| Description | Optional description of the class |
| Expiration date | Access expiration date for the class (dd/mm/yyyy) |
Then, under Linked products, select the products associated with the class.
Step 2 - Students
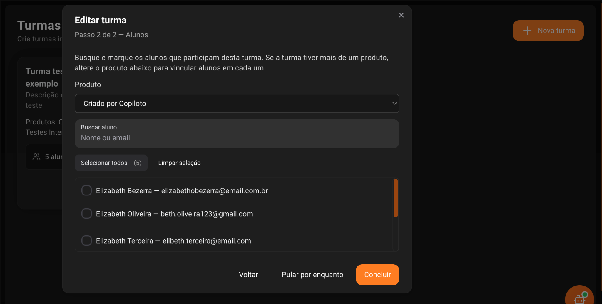
Search for and select the students who will participate in the class:
- Use Search student (name or email)
- Use Select all for bulk inclusion
- Use Clear selection to undo
- If there is more than one linked product, change the product in the selector to link students by product
Click Finish to save. If you prefer, use Skip for now to configure students later.
Manage class
Next to each class in the list, the following are available:
- Edit (pencil): changes data, products, and students
- Manage: opens the class student list
- Delete (trash): permanently removes the class
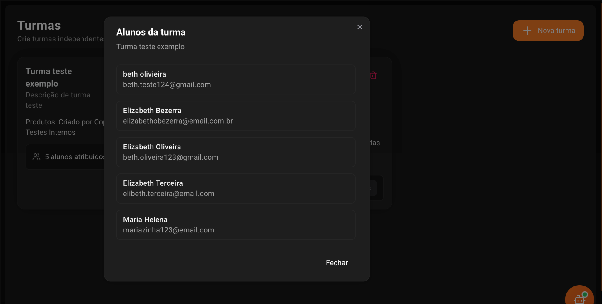
- View students: displays the list with name and email
Tip: integration per class
Each class can have its own webhook under Integrations > Inbound.
This way, you can identify which checkout or campaign each student came from at the time of purchase, without duplicating configurations between products.
This feature is especially useful for mentors with multiple products and different classes per offer or campaign.