My Clients
The My Clients area centralizes the management of all your mentees, allowing you to track their progress, register new students, import lists, and export data.
Overview
At the top of the page, four indicators summarize the performance for the selected period:
| Indicator | Description |
|---|---|
| New Mentees | Number of new students registered in the period |
| Interactions | Total interactions recorded |
| Delivered Products | Number of products released to students |
| Revenue | Total revenue for the period |
Use the selector in the upper right corner to switch between periods (This month, last 30 days, etc.).
Client List
The table displays all registered clients with the following columns:
| Column | Description |
|---|---|
| Client | Student's name and email |
| Contact | Phone via WhatsApp |
| Email Status | Email status (Delivered, Rejected, Deferred, Clicked, No info) |
| Products | Number of linked products |
| Source | How the client was registered (Manual, Hotmart, Eduzz, etc.) |
| Amount Paid | Total amount paid by the client |
| Registration | Date and time of registration |
Available filters:
- Search by name or email — finds a specific client
- All Products — filters the list by a specific product
Actions per Client
Clicking the three dots (...) next to any client in the list opens an action menu with the following options:
Actions
- View Profile — accesses the client's full page with their data and history
- View Journey — displays the student's progress and learning journey
Acquisitions
- Add Product — releases a new product for the client
- Remove Product — revokes access to a specific product
Account
- Log in as Student — accesses the platform with the student's view, without needing their password
- Generate new password — automatically generates a new password and sends it to the client's email
- Set new password — allows manually setting a new password for the client
- Require password change — prompts the client to create a new password on their next login
Attention Zone
- Remove Client — permanently removes the client from the platform
Use the "Log in as Student" option to verify the student's experience and identify any access or navigation issues.
Register Client
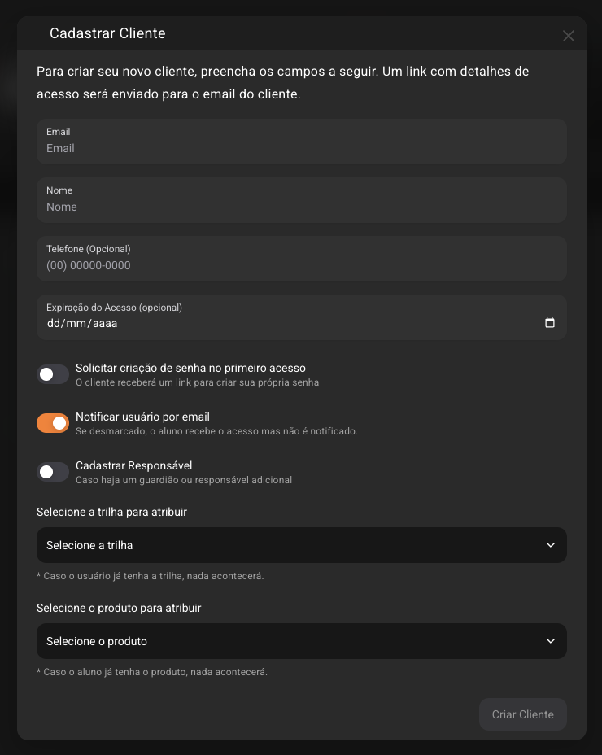
Click "+ Register" to manually add a new client. Fill in the following fields:
Email: Client's email. A link with access details will be sent to this address.
Name: Client's full name.
Phone (optional): Contact number in the format (00) 00000-0000.
Access Expiration (optional): Date when the client's access will expire, in dd/mm/yyyy format.
Additional options:
- Request password creation on first access — the client will receive a link to create their own password
- Notify user by email — when enabled, the student receives an email notification when access is granted. If disabled, access is granted without notification
- Register Guardian — enable if there is a guardian or additional responsible person linked to the student
Select the trail to assign Choose a learning trail to assign to the client. If the user already has the trail, nothing will happen.
Select the product to assign Choose the product the client will have access to. If the student already has the product, nothing will happen.
After filling in, click "Create Client".
Import Clients
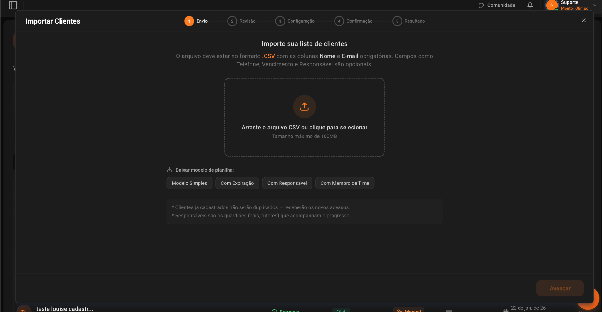
To register multiple clients at once, click "Import". The process is divided into 5 steps:
Step 1 — Upload Upload the CSV file with the client list.
- Required format: .CSV
- Required columns: Name and Email
- Optional columns: Phone, Expiration, Guardian
- Maximum size: 100MB
Spreadsheet templates available for download:
- Simple Template
- With Expiration
- With Guardian
- With Team Member
Already registered clients will not be duplicated — they will receive the new accesses. Guardians are the responsible parties (parents, tutors) who follow the student's progress.
Step 2 — Review The platform analyzes the file and displays a summary with: Total, New, Existing, and Errors. Verify the data and click "Next".
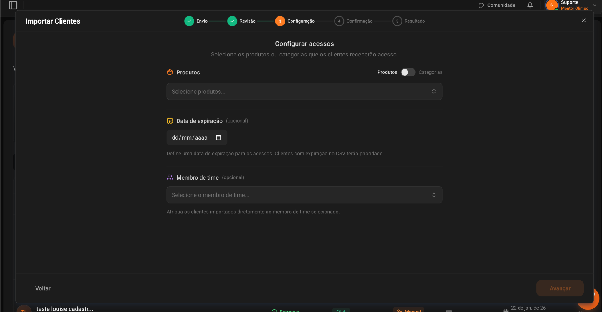
Step 3 — Configuration Configure the accesses that will be assigned to the imported clients:
- Products or Categories — select what will be released (toggle between Products and Categories)
- Expiration date (optional) — defines when access will expire. Clients with expiration in the CSV take priority
- Team member (optional) — assigns the imported clients directly to a team member
Step 4 — Confirmation Review the final summary before starting:
- New clients that will be created with an email invitation
- Existing clients that will receive new accesses
- Assigned products/categories
Do not close the tab during the import. The process may take a few minutes for large volumes.
Click "Start import" to confirm.
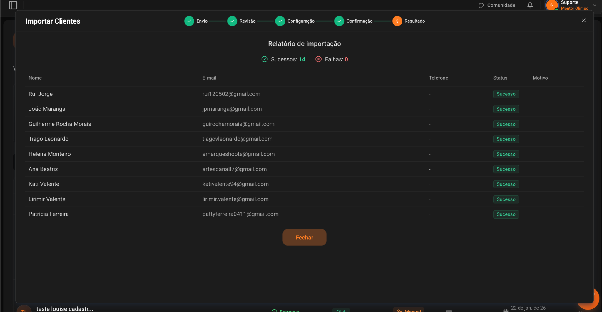
Step 5 — Result: At the end, an import report displays the result for each client with a status of Success or Failure and the reason in case of error.
Export Clients
Click "Export" to download the data in CSV format. Two options are available:
- Export Clients Only — exports the basic client information
- Export Delivered Products — exports the products and their linked clients